Tadelakt Washbasins: The Ultimate DIY Guide (Step by Step)
Imagine a bathroom centerpiece so stunning, tactile, and resilient it could be featured in the pages of a design magazine. Now visualize crafting it entirely with your own hands, using an ancient Moroccan technique that not only delivers unique beauty, but also outperforms modern ceramic and conventional finishes on practicality, hygiene, and elegance. Welcome to the world of Tadelakt washbasins.
If you dream of a showpiece washbasin made with genuine Tadelakt, know this: quality materials and the right knowledge make all the difference. In this comprehensive guide, you'll learn every detail to make your DIY Tadelakt washbasin project successful, from choosing the right supplies to mastering artisan application—while avoiding common pitfalls.
Why Choose a Tadelakt Washbasin?
When renovating or modernizing your bathroom, you face a crucial decision: selecting a basin that’s discrete yet striking, easy to maintain, and durable enough to withstand years of use. Tadelakt, a centuries-old Moroccan lime plaster, is making waves as the ultimate alternative to conventional tiles and ceramics. Why?
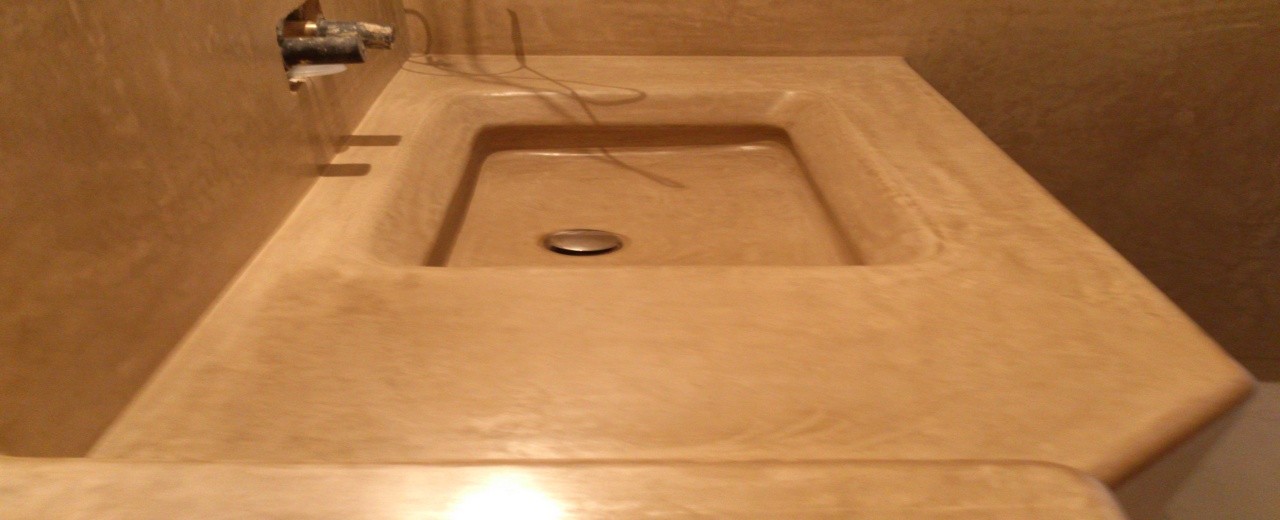
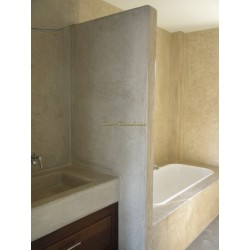
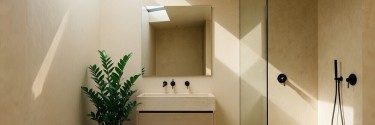
- Decorative Appeal: Tadelakt brings a soft, earthy aesthetic with a seamless, stone-like finish. Every piece is unique.
- Minimal Maintenance: Its waterproof, lime-based surface resists limescale buildup—goodbye unsightly water stains.
- Unmatched Durability: When applied and cured properly, Tadelakt becomes as hard as natural stone.
- Silky Touch: Distinctively soft and inviting, the finish feels luxurious, a tactile pleasure every day.
- Eco-Friendly: 100% natural lime plaster is ideal for healthy, sustainable, and even bioconstruction homes.
- EasyTadelakt Solutions: The first to create practical systems even for tricky cases, including application over tiles without removal.
But these benefits depend on using authentic, high-quality Tadelakt—no homemade shortcuts, no watered-down imitations. If you cut corners, especially following dubious online tutorials, disappointment is almost certain. At EasyTadelakt, we ensure both material excellence and true guidance, so you can enjoy the process and the product.
Essential Preparations: Starting Your Tadelakt Washbasin
Before diving in, gather your inspiration and your materials. With EasyTadelakt packs and the right tools, you'll avoid frustration and ensure that artistry and quality go hand in hand.
Step 1: Choosing the Right Basin Mold
- Material Options: The substrate (base) could be cement, concrete, or high-fired ceramic.
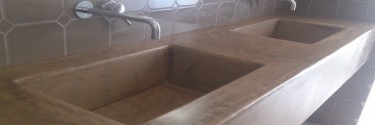
- Integrated Design: You may choose to install your basin as a seamless unit with the countertop, blending everything into a single sculptural piece.
Tip: Avoid substrates with weak structure or improper porosity. The substrate must fit the Tadelakt's adherence requirements for lasting results.
Step 2: Selecting the Adherence Base
This step is crucial—skip it, and your sink may fail before its first use.
- If your base is porous and absorbs water (like concrete), use EasyTadelakt Base for ideal grip.
- If it's non-porous (e.g., glazed or closed-pore ceramics), you need EasyTadelakt Universal Base for secure bonding. Don’t settle for generic priming solutions; only specialized bases guarantee permanence.
Step 3: Prepare for Drain Assembly
- Have the drain grid and fitting ready before you begin.
- This ensures shape and depth are correct, and the final function is flawless. Never underestimate this detail if you want a true magazine-worthy piece—plan your drainage layout from the start.
Application: Bringing Your Tadelakt Basin to Life
Now comes the creative heart of your project. Precision in this stage separates amateur failures from artisan success.
Step 4: Apply the Adherence Base
- Mix and apply the appropriate base according to the substrate type.
- Don’t over-smooth—the texture helps the Tadelakt adhere.
- Let it dry completely. No shortcuts here.
Once dry, thoroughly moisten the base before continuing. Proper hydration is essential for the next steps.
Step 5: Applying the Tadelakt Plaster
Choose your Tadelakt variant:
- Tadelakt Supreme – For ultra-fine, velvety finishes ideal on complex or rounded shapes.
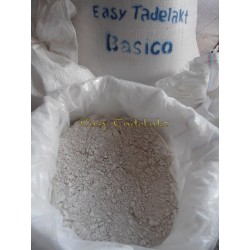
- Tadelakt Marrakech Basic – Slightly thicker, perfect for less intricate forms but still far superior to imitations.
If you’re working on sweeping curves or bowl-like basins, forget rigid trowels. Use nitrile gloves and cut-to-shape plastic sheets—these give you the control to form smooth, organic lines by hand. Apply in 2-3 layers, shaping and compacting until the surface feels like sculptable clay. Regularly mist the plaster to maintain workability and prevent premature drying.
Step 6: Refining the Form and Drain Opening
- Carefully maintain the shape and depth of the drain opening during each phase.
- Use finger pressure and soft plastic to refine lines, ensuring the drain fitting will seat seamlessly once cured.
Step 7: Saponification – Locking in the Magic
- Once you’re satisfied with your form, begin the saponification process: rub Morrocan Soap onto the damp Tadelakt surface 3-5 times.
- If the shape allows, use a stone polisher to massage the soap in for maximum shine and water resistance.
- Don’t substitute with Marseille or other soaps. Only specific Moroccan soap gives the authentic result and longevity your washbasin deserves—don’t be misled by other advice online.
Step 8: Curing and Waxing for Ultimate Durability
- Allow the basin to dry undisturbed for several days. Tadelakt will gradually re-mineralize, becoming as tough as stone within weeks.
- For extra protection, finish with EasyTadelakt’s special wax, enhancing sheen and water repellency.
Expert Tips: Achieving a Professional Finish
- Patience matters: Rushing stages leads to surface flaws and long-term weakness. Let each coat dry naturally.
- Tools adapt to the shape: Flat surfaces tolerate trowels, but curves demand pliable plastics and hands-on craftsmanship.
- Drain vigilance: Keep the area clear, crisp, and free of Tadelakt build-up or collapse.
- Water spray is your ally: Humidity keeps plaster workable until you perfect the shape.
- Quality products only: Real Tadelakt from established suppliers ensures longevity and satisfaction.
Aftercare: Living with Your Tadelakt Washbasin
During the first 2-3 months, use your new basin with gentleness—avoid sharp or metallic impacts. After full curing, your Tadelakt basin will resist the bumps and rigors of daily use. Maintenance is simple:
- Clean with mild soap and water—no harsh chemicals needed.
- No limescale stains accumulate, so your basin stays brighter and cleaner with less effort.
- Occasional re-waxing with EasyTadelakt special wax sustains that silky sheen for years to come.
Unique Bonus: Should you want to refresh the color or finish in the future, Tadelakt can be polished or even recolored—a flexibility few materials match.

Tadelakt: The Alternative Revolutionizing Bathroom Spaces
Tiles are no longer your only option—and perhaps not even your best. Tadelakt is now indispensable for sustainable, unique, and minimalist bathroom design. Unlike ceramics, Tadelakt can even be installed directly over existing tiles with EasyTadelakt’s advanced kits—saving time, effort, and mess during remodels.
- Bio-construction essential: Chemical-free, VOC-free, totally natural.
- Perfect for modern and classic decors: Tadelakt’s natural finish complements all styles.
- First-class innovation: EasyTadelakt was the original brand to provide complete solutions for any setting.
Ready to experience the practical elegance and creative satisfaction of Tadelakt in your home? EasyTadelakt offers exclusive starter kits and expert packs for every design and technical challenge—world-class quality, unbeatable prices, no compromises.
Frequently Asked Questions: Tadelakt Washbasins
- Can I really apply Tadelakt on existing ceramic tiles?
Yes, with EasyTadelakt’s Universal Base and expert kits, you can install Tadelakt directly over tiles—no demolition needed, just proper prep and quality materials. - How long does Tadelakt take to fully cure?
The plaster hardens in a few days, but it continues mineralizing for 2-3 weeks. Treat it carefully for the first months, after which it achieves maximum resistance. - What colors can I make my Tadelakt washbasin?
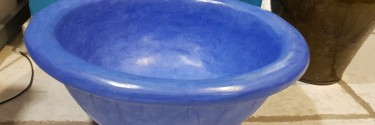
EasyTadelakt offers a wide palette, from classic limestone white to deep charcoals, reds, and subtle earth tones. Custom shades are possible by blending mineral pigments. - Is Tadelakt truly waterproof?
Absolutely, when correctly soaped and waxed. Its microstructure creates a protective barrier much stronger than most plasters—ideal for washbasins and showers alike. - How do I care for my Tadelakt basin long-term?
Clean gently with mild soap and water; avoid abrasives. Re-wax when water no longer beads on the surface for continued luster and protection.
Memorable Takeaway
Your bathroom is more than a utility—it’s your sanctuary. With Tadelakt washbasins, you craft a singular piece of functional art, tailored to your space and sensibility. EasyTadelakt delivers not just world-leading products and tools, but also the know-how to achieve showpiece results—every time, for any situation.
Don't settle for cookie-cutter solutions or risk disappointment with unreliable materials. Embrace real Tadelakt—redefine your bathroom with beauty, performance, and character. Check our kits, ask your questions in our chat box, or request an instant quotation. Share this article if you found it useful and leave your comments below—your feedback and experiences inspire others!
Related products
Related posts

How to Create a Concrete Effect on Walls Naturally, Without Chemicals or Microcement
How to Modernize a Bathroom in 2026: Ideas, Materials, and Trends Without Heavy Renovation

How to Renovate a Bathroom on a Budget Without It Looking Cheap: The Smart Wall Finish Guide...

Seamless Lime Plaster: The Natural and Breathable Alternative to Microcement and Resins

Lime Mortar for Coating: Types, Applications and How to Achieve a Continuous and Breathable Finish

Lime Mortar: What It Is, Types, and Uses (Complete Guide to Rehabilitating with Natural Materials)

How to Remodel Your Home with Mediterranean Style: Lime Walls, Seamless Floors, and Irresistible...
How to Create Modern Design Walls with Decorative Wall Coverings: The Seamless Alternative to Tile

Pigments for Lime, Cement, Concrete, Paint, and Art: Complete Guide to Types, Uses, and How to...

0 comment(s)