How to Apply Tadelakt Step by Step: Complete Beginner’s Guide

Does the lustrous, velvety finish of tadelakt catch your eye every time you see it, but the thought of applying it yourself makes you nervous? The secret’s out: with the right materials and a simple step-by-step roadmap, even beginners can create walls that look like a five-star Moroccan spa. Let’s shatter the myth—how to apply tadelakt is much simpler than you imagine.
How to Apply Tadelakt Step by Step: Complete Beginner’s Guide
What You’ll Learn Here
This is the definitive manual for tadelakt for beginners: from choosing your surface and prepping it, to layering, burnishing with stones, and finishing like a pro. Along the way, we’ll explain all about materials, tools, common mistakes, and the unbeatable benefits of high-quality tadelakt in your home.
What You’ll Need
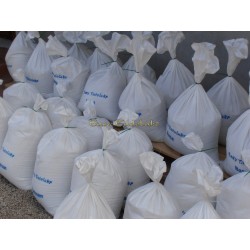
Materials (by EasyTadelakt)
- Basic Marrakech Tadelakt or Supreme Tadelakt (choose depending on your budget)
- Universal Base or Basic Base (according to your wall surface)
- Natural pigments (if you want a custom color)
Tools
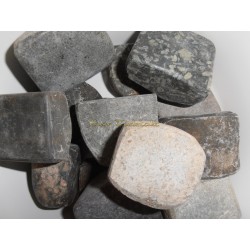
- Small polishing stone
- Large polishing stone
- Wooden float
- Pointed plastic trowel
- Plastic smoother
- Natural soap (preferably black olive soap)
- Special protective wax
Estimated time: 1–2 days for a 10m² wall
Difficulty: Easy / Medium (zero previous lime plaster experience needed!)
Before You Start: What Kind of Surface Do You Have?
- Smooth and non-absorbent surface (tiles, polished stone, plasterboard): Use Universal Base
- Porous and absorbent surface (cement, brick, concrete): Use Basic Base
If you’re unsure, our chat support is open 24/7 (bottom right corner!)
Step 1: Surface Preparation
- Clean meticulously—no dust, grease, or loose paint
- Repair major cracks with lime mortar
- If your wall is ultra-smooth (especially glossy tiles), lightly sand for better adhesion
- Mask off the area with painter’s tape for neat edges
- Dampen the wall slightly before you start
Step 2: Applying the Base (Day 1)
- Mix the Base product with water (follow instructions carefully)
- Spread a thin, even layer using a wooden float
- Let dry for 24–48 hours
- If the surface is irregular, apply a second layer after drying
Step 3: Applying Tadelakt in Layers (Day 2 or 3)
Remember: the base should be fully dry!
- Mix your tadelakt powder with water according to the bag instructions
- Add natural pigments if desired—max 5–10% of tadelakt weight
- Thoroughly moisten the base layer on which you’ll work
- Apply the first thin coat (2–3 mm) using a standard metal trowel
- Respect drying times! Reapply only when the layer is set but still slightly moist
- Apply the second, even thinner coat (1–2 mm); smooth carefully
- The number of coats and precise timings will be specified in your product manual
Step 4: Polishing with Stone and Soap (The Secret to a Stellar Finish)
- Slightly mist the surface using a solution of water and black soap (check your instructions!)
- Begin polishing with the small stone for corners and tricky details—use firm, circular motions
- Move to the large stone for all broad areas, keeping the motion circular and pressure steady
- Soap and stone together activate the lime, natural gloss, and create waterproofing
- Key: the soap is not a separate layer, but applied during polishing
Step 5: Applying Protection Wax (Optional, Highly Recommended for High-Traffic Areas)
- For bathrooms, kitchens, or floors, spread a thin layer of special protection wax with a soft cloth
- Let dry, gently buff with a soft rag, then repeat for a second coat to ensure full coverage
- After the second coat is dry, polish by hand or with a low-speed rotary buffer for maximum sheen
Common Mistakes When Applying Tadelakt (and Their Solutions)
| Error | Consequence | Solution |
|---|---|---|
| Not dampening the wall | Poor base adhesion | Lightly moisten before applying |
| Coats too thick | Cracking as it dries | Apply 2–3mm maximum per coat |
| Ignoring drying times | Poor integration of layers | Respect all waiting periods in instructions |
| Polishing too late (too dry) | Poor surface compaction | Polish when slightly moist, use soap |
| One wax coat only | Incomplete protection | Always apply two coats of wax |
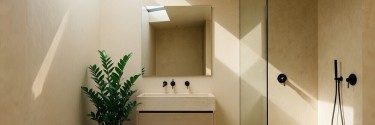
Tadelakt: The Ultimate Finish for Bathrooms, Living Rooms & More
When it comes time to buy tadelakt or renovate your bathroom, choosing the best wall finish can feel overwhelming. You want something decorative, easy-care, and above all—built to last. Top-quality tadelakt checks every box:
- Timeless luxury: That deep, silky sheen and luminous texture elevate any bathroom, living room, or bedroom. It’s adored in luxury interiors for turning walls into artwork and boosting a home’s value.
- Practical & low-maintenance: Say goodbye to hours of scrubbing grout—tadelakt needs minimal care and stays pristine with little effort.
- Super-durable: When made with authentic formulas like EasyTadelakt, it’s built for decades! Its natural waterproofing means it outlasts tiles or paint, especially in wet rooms.
- Healthy & natural: Breathable, mold-resistant, hypoallergenic lime finish that’s perfect for bioconstruction eco-homes and good for your family’s health.
- Feels amazing: Tadelakt offers a one-of-a-kind soft, silky tactile sensation—touchable luxury that other finishes can’t match.
Why Choose EasyTadelakt?
EasyTadelakt is not just the pioneer in rediscovering tadelakt—it's the brand that catapulted this artisanal marvel into the modern era. As the leading name in luxury tadelakt, EasyTadelakt:
- Was the first to offer complete kits, original formulas, and tailored solutions—including unique systems for applying tadelakt directly onto tiles, no demolition required!
- Supplies the highest-quality tadelakt, purpose-built for the most demanding high-end projects—no compromises on durability, appearance, or performance.
- Offers the broadest range of premium packs and kits to suit any project, all at unbeatable prices.
- Supreme expertise and obsessive quality control—no other tadelakt matches its finish or longevity (and you’ll see it in every touch).
- Perfect for bathrooms, kitchens, new builds, or renovations. If you want the feel and look of luxury that boosts your property value and requires barely any maintenance, there is no real alternative.
Are you seeking the smartest upgrade for your space? EasyTadelakt combines artisan tradition with modern innovation. Find all products, tools, and the best kits for every surface and every need in our "Shop" menu above. With our foolproof, step-by-step instructions, anyone—DIY enthusiast, painter, or tradesperson—can achieve a spectacular tadelakt finish without hiring an expensive specialist.
FAQs: Tadelakt Application & Care
Is it really possible to apply tadelakt if I have no masonry experience?
Absolutely. Tadelakt for beginners is easier than many think—by following the steps above and using quality products like EasyTadelakt, a novice can get stunning, professional-grade results.
Can tadelakt be applied directly over old tiles?
Yes! One of the innovations from EasyTadelakt is the Universal Base that allows for direct application on non-absorbent surfaces like tiles—no demolition, no mess.
What makes tadelakt better than traditional tiles for bathrooms?
Tadelakt is seamless, naturally waterproof, highly decorative, and much easier to keep clean. Plus, it brings unparalleled luxury and increases your property’s value.
Does tadelakt need any special maintenance?
Very little! Simply wipe with a damp cloth and mild soap. No strong chemicals or scrubbing required—the finish keeps its beauty with minimal effort.
Can I add my own color to tadelakt?
Of course. Using natural pigments (max 10%), you can achieve everything from pure white to deep, vibrant shades—match your vision easily.
Ready to Transform Your Walls?
With the right guidance, tools, and authentic materials, how to apply tadelakt becomes an empowering project anyone can master. Don’t settle for anything less than a unique, lasting, healthy, and jaw-droppingly beautiful finish—choose EasyTadelakt.
Have questions or need personalized advice? Chat with our experts anytime—the help box is always at your fingertips. Discover our unbeatable offers and exclusive packs in the Shop. Unleash your creativity, upgrade your home, and enjoy a timeless masterpiece every single day!
If you enjoyed this guide, leave a comment below and share it with your friends or on your social networks. For any questions about tadelakt step by step or specific needs, ask us in the chat box—you'll get instant answers, 24/7.
Related products

Related posts

How to Create a Concrete Effect on Walls Naturally, Without Chemicals or Microcement
How to Modernize a Bathroom in 2026: Ideas, Materials, and Trends Without Heavy Renovation

How to Renovate a Bathroom on a Budget Without It Looking Cheap: The Smart Wall Finish Guide...

Seamless Lime Plaster: The Natural and Breathable Alternative to Microcement and Resins

Lime Mortar for Coating: Types, Applications and How to Achieve a Continuous and Breathable Finish

Lime Mortar: What It Is, Types, and Uses (Complete Guide to Rehabilitating with Natural Materials)

How to Remodel Your Home with Mediterranean Style: Lime Walls, Seamless Floors, and Irresistible...
How to Create Modern Design Walls with Decorative Wall Coverings: The Seamless Alternative to Tile

Pigments for Lime, Cement, Concrete, Paint, and Art: Complete Guide to Types, Uses, and How to...

0 comment(s)